

How To Deploy a WordPress Blog with AWS
Recently, I successfully deployed my medical blog at https://blog.percura.hamdtel.co.uk using AWS EC2 and Route 53.
To achieve this, I installed WordPress along with an Apache web server on an EC2 instance. I then associated the instance with an Elastic IP address, which I used to create an A record on my Route 53 domain. To ensure the site was secure, I used Certbot to set up HTTPS for encrypted communication. Below, I'll walk you through the process so you can do the same:
Launching The EC2 Instance
Log into the AWS console and go into EC2. Then go ahead and go into the Launch Instance wizard.
Give your instance a name and then select Ubuntu as the AMI for your instance:
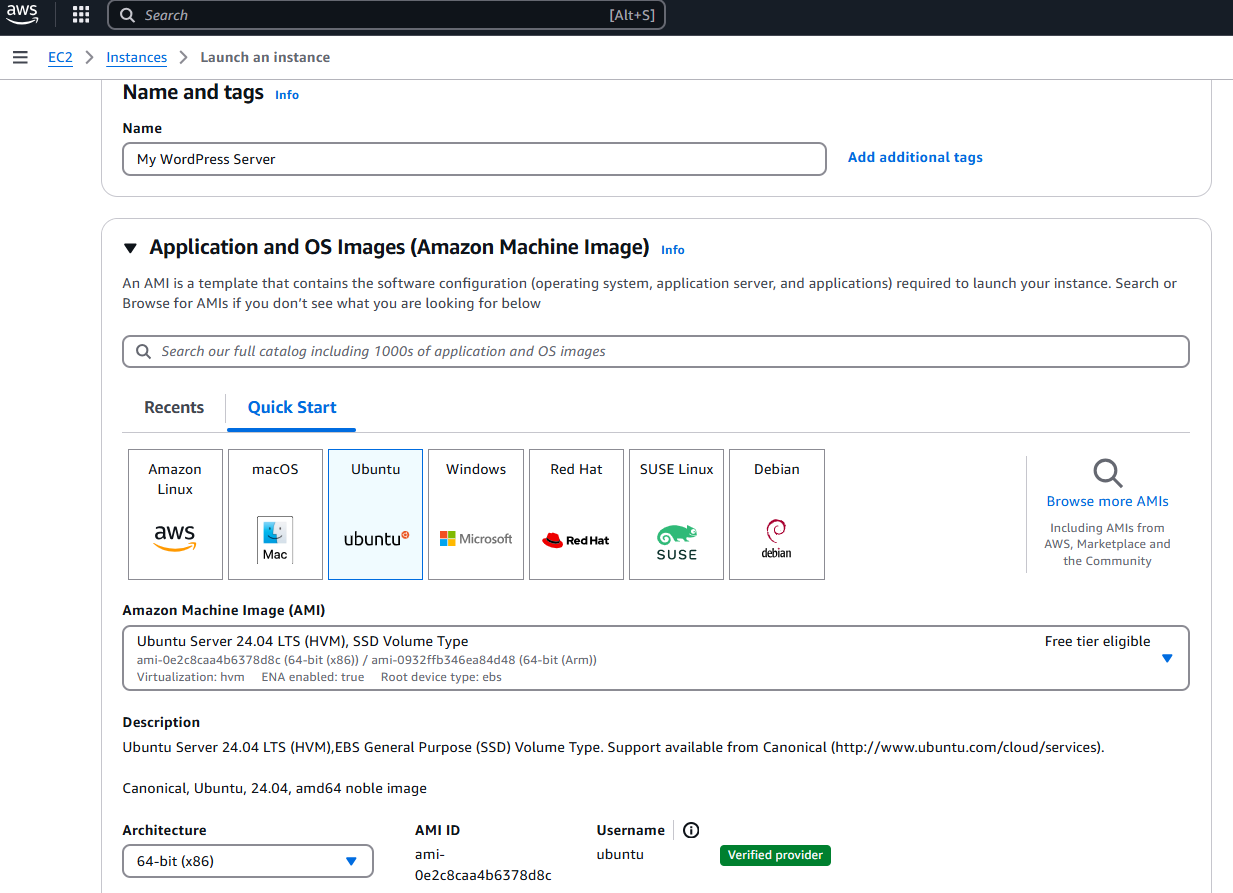
I recommend you choose t2.micro as your instance type as it falls within the free tier, however depending on how much traffic you expect your blog to receive you can choose a more powerful instance (compare instance types at https://instances.vantage.sh/).
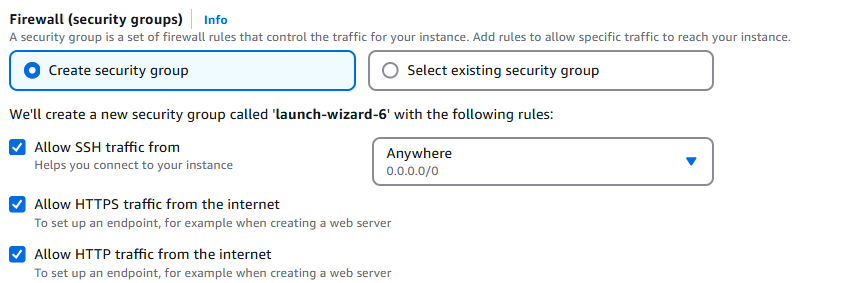
You can generate a new key pair for your instance if you haven't already, and in your network settings, ensure to check off Allow HTTPS traffic from the internet and Allow HTTP traffic from the internet.
You can customise the amount of storage your EBS volume will have, however ensure it is under 30 GB if you want to stay within the free tier.
After launching your instance, you can select it and click on Connect to connect to it via EC2 Instance Connect.

Installing Required Packages onto the Instance
We will be using the apt package manager to install what we need to be able to serve WordPress: apache for the web server and my-sql-server for the database server.
First, update apt so that we don't install outdated packages:
$ sudo apt update -y
Once that is done, we are going to install Apache, a web server which we will use to serve WordPress.
$ sudo apt install apache2 -y
The next step to install is the database server; we will use mysql:
$ sudo apt install mysql-server -y
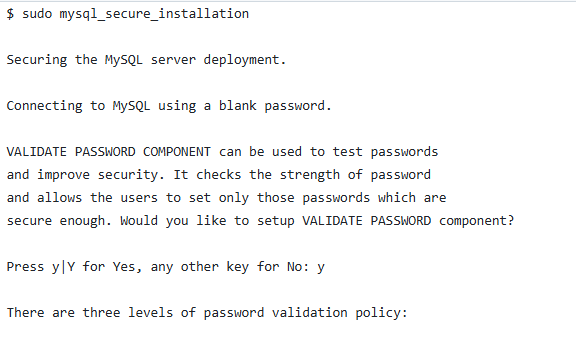
Now we need to secure the database installation, and this can be done via the command:
$ sudo mysql_secure_installation
You will be asked questions about how you want to proceed with securing the database. You can see what I put in this GitHub Gist but feel free to put what you want.
As WordPress functions using PHP (and some extensions to it), we need to install it too. You can copy the following command to do so:
$ sudo apt install php-curl php-json php-mbstring php-xml php-zip -y
We also install libapache2-mod-php for PHP to work with Apache, and php-mysql for PHP to work with the MySQL database.
Now we can restart Apache:
$ sudo systemctl restart apache2
Setting up MySQL Database
We now need to setup a database for WordPress to use. First enter the MySQL editor:
$ sudo mysql
And then copy the following lines one by one:
CREATE DATABASE wordpress;
CREATE USER 'wpuser'@'localhost' IDENTIFIED BY '[REPLACEWITHASECUREPASSWORD]';
GRANT ALL PRIVILEGES ON wordpress.* TO 'wpuser'@'localhost';
FLUSH PRIVILEGES;
EXIT;
The first line creates a database 'WORDPRESS'. The next one creates a new user called 'wpuser' which can only connect from localhost (the same EC2 instance it is hosted on) for security and following the best practice of providing least privilege. The third line grants wpuser the ability to do anything on all tables of the WORDPRESS database and "FLUSH PRIVILEGES" updates MySQL's in memory privilege table to ensure the changes take immediate effect.
Install WordPress
We are now going to download the WordPress files to our instance. We will need to get the files and then set their permissions correctly.
First navigate to the web root (/var/www/html) as this is where the files need to be extracted.
$ cd /var/www/html
Now we need to download and extract the .zip file containing WordPress:
$ sudo wget https://wordpress.org/latest.tar.gz $ sudo tar -xzf latest.tar.gz
And then move the files into the wordpress/ directory:
$ sudo mv wordpress/* .
To ensure that Apache can access WordPress, we need to set the proper permissions for it:
sudo chown -R www-data:www-data /var/www/html sudo chmod -R 755 /var/www/html
"sudo chown -R www-data:www-data /var/www/html" gives ownership of all files in the web root (containing the files for WordPress) to the www-data group, which is where web servers like Apache operate. "sudo chmod -R 755 /var/www/html" gives the owner of the web root (which we have set to be Apache) full read/write access to it.
Now we need to tell WordPress our database's details. The WordPress installation files come with a file called wp-config-sample.php however WordPress (once installed) expects the config files to be at wp-config.php, so we need to rename it.
$ sudo mv wp-config-sample.php wp-config.php
Now we need to edit it to have the details of the database. We will do this using the nano editor:
$ sudo nano wp-config.php
Inside the editor, paste the following code, replacing the details with the ones from your database:
define( 'DB_NAME', 'wordpress' ); define( 'DB_USER', 'wpuser' ); define( 'DB_PASSWORD', '[REPLACEWITHASECUREPASSWORD]' ); define( 'DB_HOST', 'localhost' );
Then press Ctrl+O to save and Ctrl+X to exit.
You should now be able to view WordPress using your EC2 instance's IP address in your browser! But right now it will only work on HTTP.
Setup HTTPS
You will need to have a custom domain for this - it doesn't have to be purchased through Route 53 though, it can be through any registrar as long as you have access to the DNS records.
To ensure that our EC2 instance's IP address will be persisted even if it is shutdown, we will need an Elastic IP address. Navigate to the "Elastic IPs" section under "Network & Security" and click on Allocate Elastic IP address:
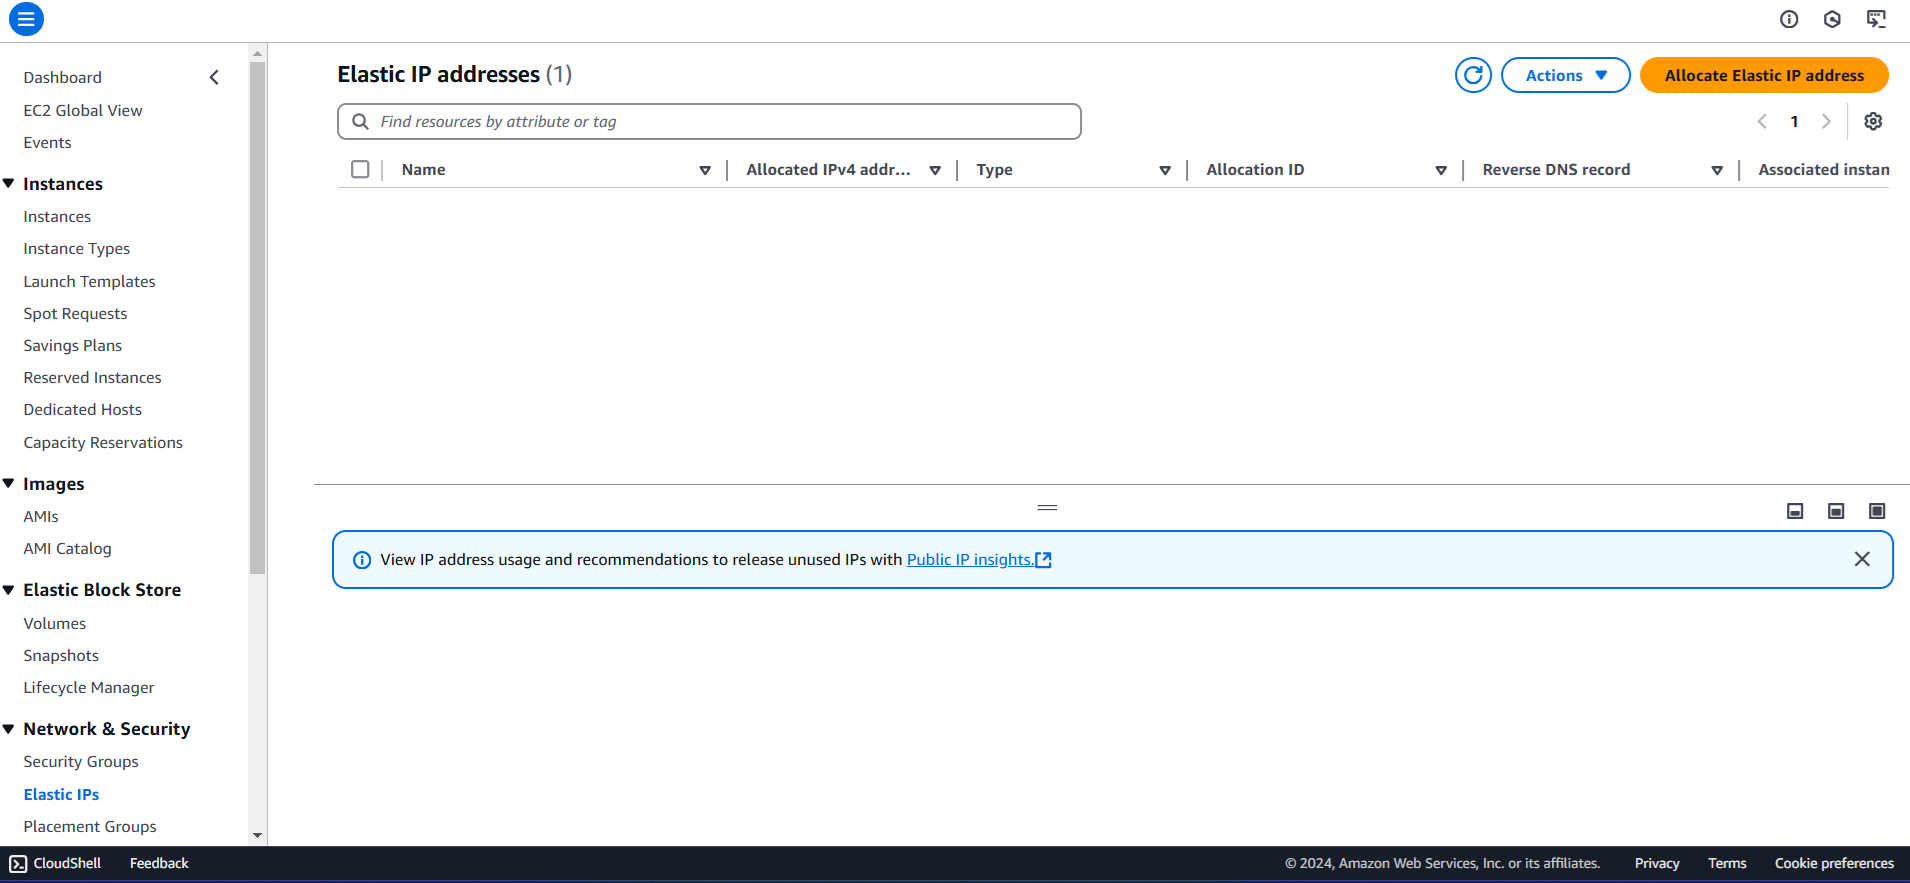
Once allocated, right click the IP Address and click on Associate. Then select the instance you launched, and then your instance will have a new elastic IP Address.
Now in your domain's DNS records, add a new A record with the Elastic IP as the value. Now if you visit your website using HTTP (e.g. "http://yourdomain.com") you should see your WordPress installation.
Now let's setup HTTPS support on our instance. We will do this for free using certbot, which we have to install first:
$ sudo apt install certbot python3-certbot-apache -y
Now run:
$ sudo certbot --apache
And go through the instructions to setup HTTPS.
Potential Costs
You may incur costs for running your EC2 Instance and EBS storage if it they are not in the free tier. Your elastic IP address might also incur costs. Overall though this should be very affordable.
It is also worth noting that this kind of architecture shouldn't be used if you intend to launch a large blog, in which case deploying your own VPC, RDS database etc. would make more sense. Let me know if I should go through what such architecture may look like!
Some Problems With This Architecture
This type of architecture is known as a monolithic application: the web tier, application tier and the database tier are all running on one compute instance, and this will cause bottlenecks in your blog's performance as all work is being done by one singular instance. Splitting the tiers and decoupling them would make more sense. I would recommend architecting your own VPC, and lauching instances in public subnets that will serve your blog, another set of subnets that can host WordPress logic, and a final set of private subnets that can host an RDS database (or Aurora, or any databse for that matter!) to host your blog data. To prevent performance overloads or throttling you can decouple the tiers using two SQS queues as well.
For a simple blog however, a monolithic architecture is fine.
Summary
Now you know how to deploy a WordPress blog using Apache and MySQL. Thank you for reading!
Written By Hamd Waseem
Featured Image